containers - The GNOME Shell Extension to manage podman containers
In my daily I usually start linux containers with podman to have easily and quickly tools; such as databases, brokers or systems. This method allow me to avoid to install locally and administrate them locally.
To manage these linux containers I have usually local scripts with the arguments, parameters and set up to
my use cases (I forget very easily the commands … yes, I know! the history command could
help me but I am lazy ![]() ). These scripts include the typical options to start, stop, delete
and so on. For many of my colleagues use these kind of commands are very common, however for me it is
a little tedious and bored
). These scripts include the typical options to start, stop, delete
and so on. For many of my colleagues use these kind of commands are very common, however for me it is
a little tedious and bored ![]() so to have a graphical tool will be great and better for me
so to have a graphical tool will be great and better for me ![]() .
.
So here is when I found a great tool to integrate with my Fedora laptop …
containers - the GNOME shell extension to the rescue 
Containers is a gnome-shell extension
to manage linux containers, run by podman. A simple menu allows us
to execute the most typical actions ![]() , such as:
, such as:
- start
- stop
- remove
- pause
- restart
- top resources: opens the
topcommand output (user,cpu,elapsed,time,command) in a new terminal.
 - shell: opens a shell in a new terminal
 .
. - stats: open statistics
 (cpu,memory,networking,io) in a new terminal with updating live.
 - logs: following logs in a new terminal
 .
.
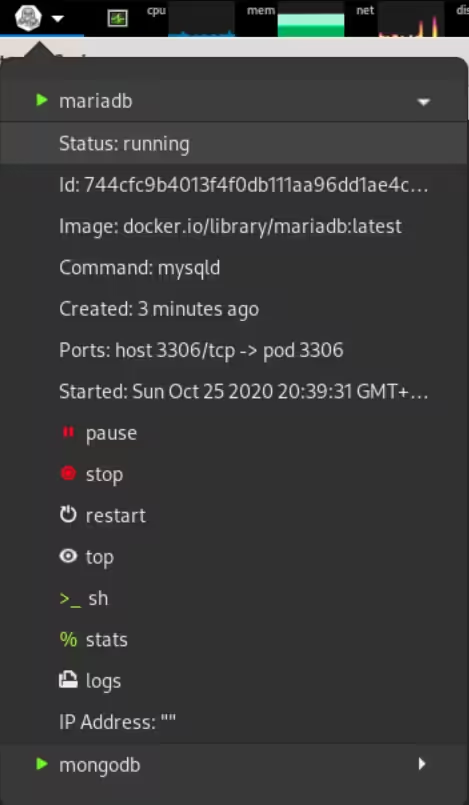
The menu also showed most of the inspect info ![]() of the container, such as:
of the container, such as:
- status: running, stopped, exited, …
- id
- image
- command
- Created time
- Started time
- IP address
- ports
A sample screenshot ![]() of this amazing tool is similar to:
of this amazing tool is similar to:
Managing containers
The extension manages the current pods created in your local environment, basically
from podman ps -a command. So the first time to add containers you must to start them
with the right arguments and setup for your use case.
For example to start a local MongoDB instance, the command could be similar to:
❯ podman run -d -p 27017:27017 --name mongodb mongo
649cc435939a66537e11686c8d400c83250de5314b6735a8ade2a00a0a49b8b2
Or to start a local MariaDB instance could be similar to:
❯ podman run -d -p 3306:3306 -e MYSQL_ROOT_PASSWORD=mypass --name mariadb mariadb:latest
744cfc9b4013f4f0db111aa96dd1ae4cf53bbd85f920c19470bef857b0836846![]() Note: The
Note: The -d argument starts detached the pod from the terminal (similar to execute in background).
These commands will start two new pods as we could check with:
❯ podman ps
CONTAINER ID  IMAGE                             COMMAND  CREATED         STATUS             PORTS                     NAMES
744cfc9b4013  docker.io/library/mariadb:latest  mysqld   28 seconds ago  Up 28 seconds ago  0.0.0.0:3306->3306/tcp    mariadb
649cc435939a  docker.io/library/mongo:latest    mongod   40 minutes ago  Up 40 minutes ago  0.0.0.0:27017->27017/tcp  mongodb
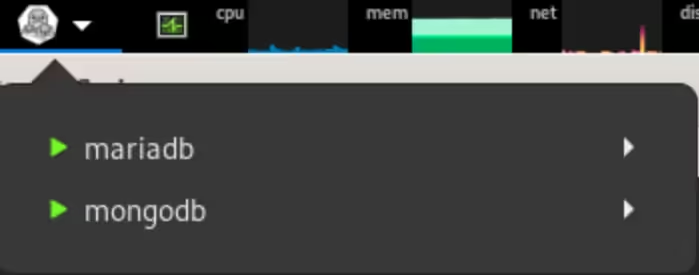
These pods will be showed in the shell-menu as:
Managing pods
podman-compose allows to start pods (a group of containers as an unit), very useful when you have to compose a set of containers in one place.
For example, the following docker-compose-kafka.yml file describes a pod definition to start an
Apache Kafka topology instance (zookeeper + broker):
version: '3'

services:
  zookeeper:
    image: strimzi/kafka:0.20.0-kafka-2.5.0
    command: [
      "sh", "-c",
      "bin/zookeeper-server-start.sh config/zookeeper.properties"
    ]
    ports:
      - "2181:2181"
    environment:
      LOG_DIR: /tmp/logs

  kafka:
    image: strimzi/kafka:0.20.0-kafka-2.5.0
    command: [
      "sh", "-c",
      "bin/kafka-server-start.sh config/server.properties --override listeners=PLAINTEXT://0.0.0.0:9092 --override advertised.listeners=PLAINTEXT://localhost:9092 --override zookeeper.connect=zookeeper:2181"
    ]
    depends_on:
      - zookeeper
    ports:
      - "9092:9092"
    environment:
      KAFKA_LISTENERS: PLAINTEXT://0.0.0.0:9092
      KAFKA_ADVERTISED_LISTENERS: PLAINTEXT://localhost:9092
      KAFKA_ZOOKEEPER_CONNECT: zookeeper:2181
      LOG_DIR: /tmp/logs
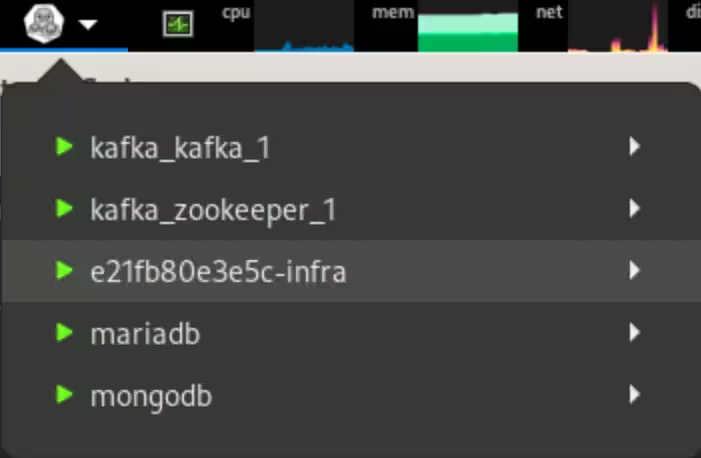
To start up this pod, we could use the following command:
❯ podman-compose -f docker-compose-kafka.yml -t 1podfw -p kafka up -d
podman pod create --name=kafka --share net -p 2181:2181 -p 9092:9092
e21fb80e3e5ce6f156253277b14fbb66b013afdcae9fec468c42c6afde3a6668
0
podman run --name=kafka_zookeeper_1 -d --pod=kafka --label io.podman.compose.config-hash=123 --label io.podman.compose.project=kafka --label io.podman.compose.version=0.0.1 --label com.docker.compose.container-number=1 --label com.docker.compose.service=zookeeper -e LOG_DIR=/tmp/logs --add-host zookeeper:127.0.0.1 --add-host kafka_zookeeper_1:127.0.0.1 --add-host kafka:127.0.0.1 --add-host kafka_kafka_1:127.0.0.1 strimzi/kafka:0.20.0-kafka-2.5.0 sh -c bin/zookeeper-server-start.sh config/zookeeper.properties
c6eba2decd63be4f28366546c96e00842d84442b48fdcc97a691a058cccd46dd
0
podman run --name=kafka_kafka_1 -d --pod=kafka --label io.podman.compose.config-hash=123 --label io.podman.compose.project=kafka --label io.podman.compose.version=0.0.1 --label com.docker.compose.container-number=1 --label com.docker.compose.service=kafka -e KAFKA_LISTENERS=PLAINTEXT://0.0.0.0:9092 -e KAFKA_ADVERTISED_LISTENERS=PLAINTEXT://localhost:9092 -e KAFKA_ZOOKEEPER_CONNECT=zookeeper:2181 -e LOG_DIR=/tmp/logs --add-host zookeeper:127.0.0.1 --add-host kafka_zookeeper_1:127.0.0.1 --add-host kafka:127.0.0.1 --add-host kafka_kafka_1:127.0.0.1 strimzi/kafka:0.20.0-kafka-2.5.0 sh -c bin/kafka-server-start.sh config/server.properties --override listeners=PLAINTEXT://0.0.0.0:9092 --override advertised.listeners=PLAINTEXT://localhost:9092 --override zookeeper.connect=zookeeper:2181
87a8e215f0ccf48a5e976444b5d4e7650879a4ab9e4a4c0ce5a88138e7eb99fe
0
Now you have an Apache Kafka pod instance up and running ![]() .
.
Summary
This amazing GNOME shell extension will help you to manage easily your local linux containers, and since I started
to use it … I feel more productive ![]() .
.
Enjoy it!


